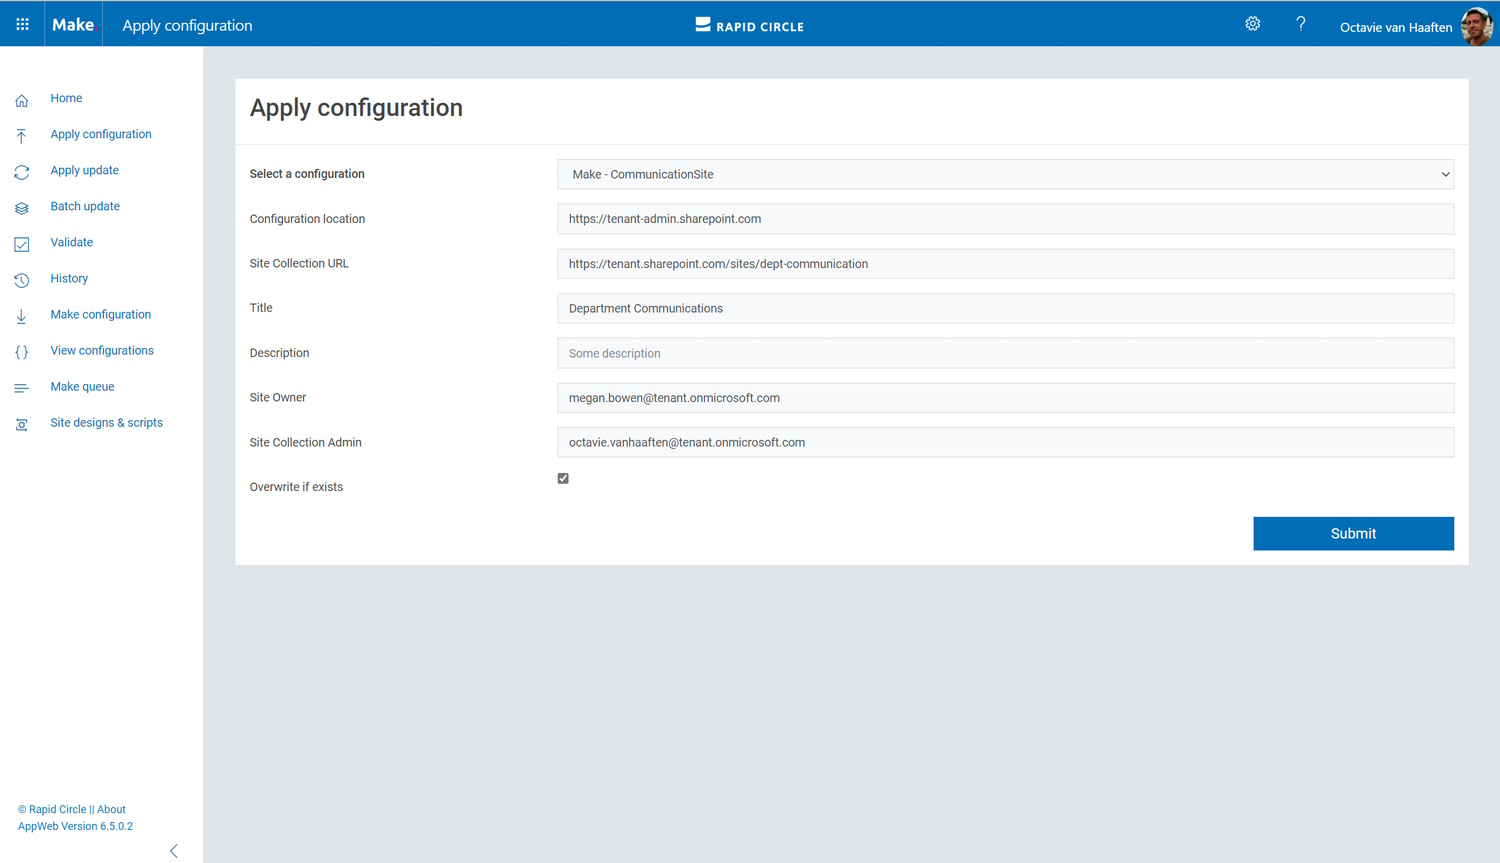
To create a configuration request and adding it to the queue a configuration must be applied. To do this navigate to the ‘Apply configuration’ page (figure 2). To create a configuration to apply here either use the ‘Make configuration’ page or create a template yourself. To be able to select the template here it must have the name ‘configuration.xml’.
The Make interface offers a standardized way to put your templates to use and start provisioning and configuring your SharePoint environment. Note that this is not the only way to start Make tasks, for more information on custom made solutions for putting Make to action please contact your Rapid Circle consultant.
Figure 2: Apply configuration
Select a configuration
An existing configuration can be selected using this dropdown. The existing configurations can be seen and edited by navigation to the ‘View configurations’ page. With a configuration selected, Make will display a form where you can specify where the template will be applied on your SharePoint farm or tenant. Additionally, the template specific parameters are displayed.
Configuration location
The configuration location is the starting location where Make will start applying the template. If you are creating site collections, this should be the root of your tenant or web application. For subsites you can specify the absolute URL of the parent site.
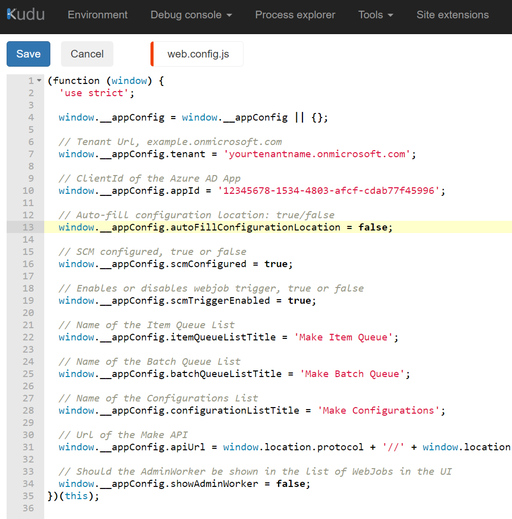
NOTE |
if you do not see this field, check out the web.config.js. It could be the setting is set to AutoFill, which could be handy if you create site collections and teams only. |
Additional parameters
When a configuration is selected additional input fields will be shown. These input fields correspond to the parameters of the configuration. These parameters are used in the template. Each input field must have a value.
Regular Expressions
It is possible to use regular expressions to validate user input when applying a new configuration.
To use this functionality add a “regex” : “REGULAR_EXPRESSION” to the parameter field in the parameters JSON.
For example if I would like to use a regular expression to validate if a user types an email address I could use the following JSON:
|
|
NOTE |
Be sure to escape characters to make it a valid JSON. As you can see the “\” is escaped by using an additional “\”. An (online) JSON validator is recommended. |
NOTE |
Do not use leading and trailing slashes. “/^[a-zA-Z0-9.!#$%&’*+/=?^_`{ |
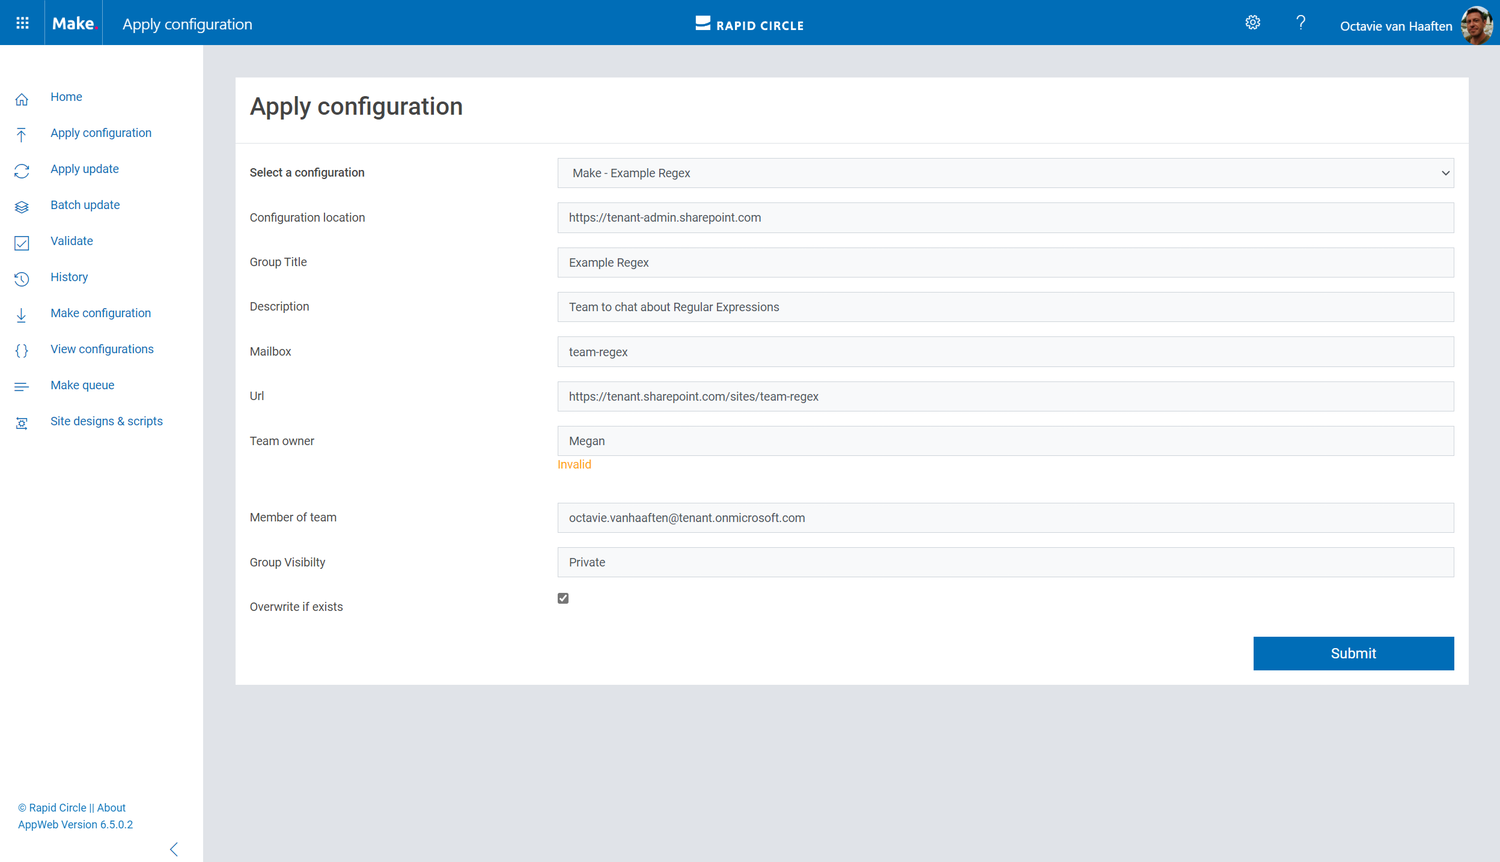
When Applying this configuration using the Make UI. A valid email address must be inserted in the “Group Owner 1” input box. If this is not the case an Invalid message will appear and the configuration may not be submitted.
Figure 4: Regular expression validation


