- Log on to the web server
- Start Internet Information Services Manager
- In the left pane right-click the folder Sites and click the Add Site option
Figure 1: Adding IIS website
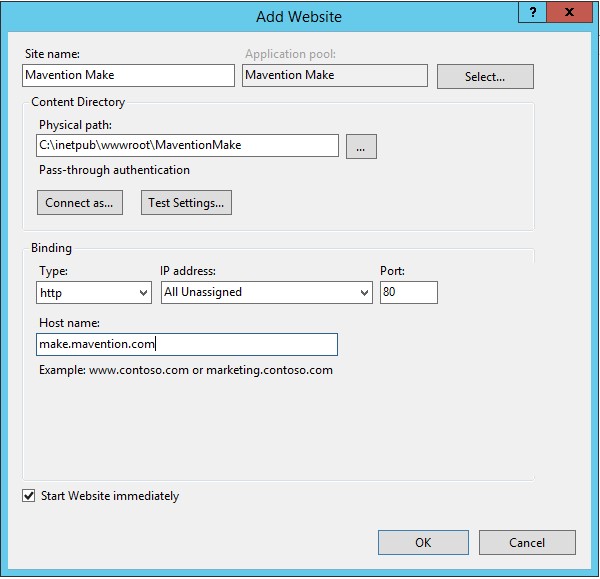
- Enter the site name Make, a valid physical path and a host name that is DNS enabled
Figure 2: Creating IIS website
Although it is recommended to have HTTPS configured, it is not required.
- Click the
OKbutton to create the IIS website
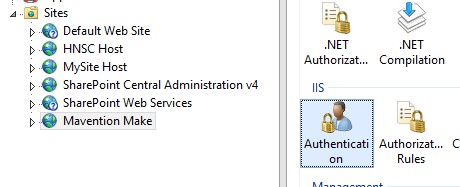
Once the new website is created, the authentication settings need to be configured. - In the left pane select the website Make
- In the right pane double click the Authentication icon
Figure 3: Select IIS Authentication
- If disabled, select Anonymous Authentication and in the Actions pane click the Enable link
- If disabled, select the authentication system that the web application is designed to use and in the Actions pane click the Enable link. If the web application’s code uses the generated code in the TokenHelper and SharePointContext files without modification, then the web application is using Windows Authentication, so that is the option you should enable.
Figure 4: Select IIS Authentication
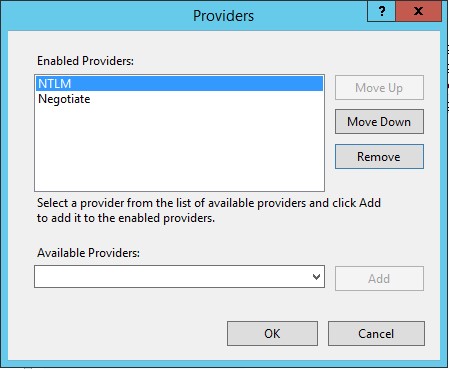
- If you are using the generated code files unmodified, you also need to configure the authentication provider with the following steps:
- In the Authentication pane select Windows Authentication
- Click the Providers button.
- In the Providers dialog, ensure that NTLM is listed above Negotiate.
Figure 5: Select IIS Authentication
- Click the
OKbutton.
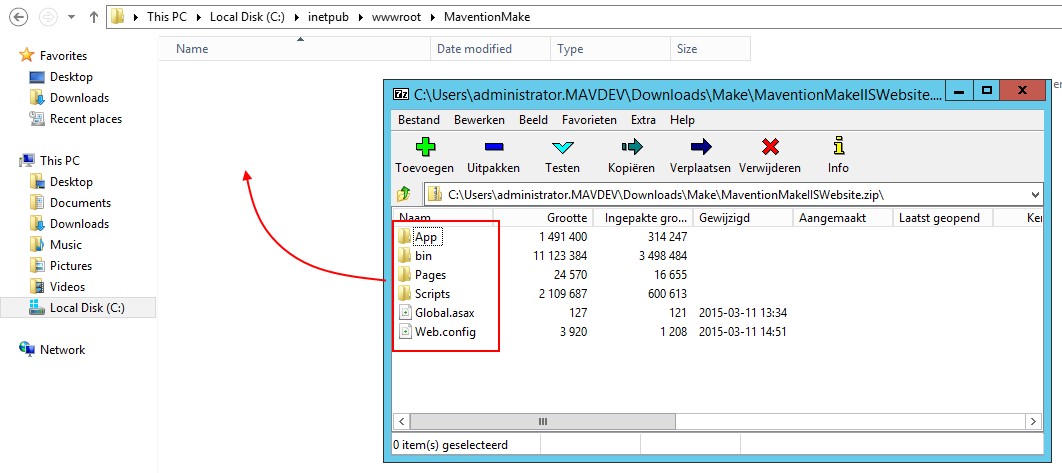
The website content files need to be copied.
- Unzip the Mavention.Make.SharePointApp.Web.zip file and copy the contents to the folder you have configured in IIS for the web site, eg. C:\inetpub\wwwroot\ PortivaMake
Figure 6: Unzip IIS Website Contents


