If you are confident with PowerShell and troubleshooting Azure and Office 365 environments, you have the option to automate the installation of Make. Almost every resource and configuration will be created, provisioned and relevant information will be logged. This is quite useful for your administration.
PowerShell
- Start Windows PowerShell
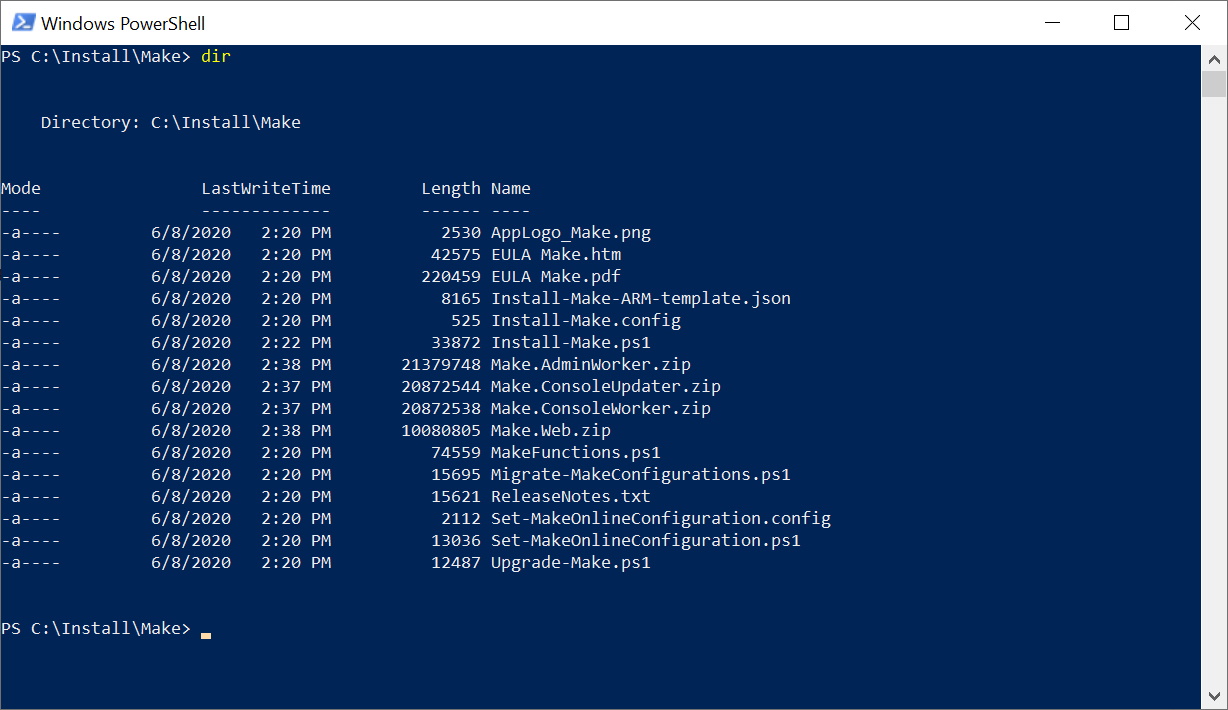
- Navigate to the location of the Make installation files
Figure 1: PowerShell Directory
The script Install-Make.ps1 needs to be executed. This script has the following parameters:
| Property | Description |
|---|---|
| Environment | Environment that you are deploying to. Valid values are PRD (Production), ACC (Acceptance), TST (Test), DEV (Development) |
| Location | Location for the deployment of the Azure Web App. E.g. westeurope, northeurope, westus. Default is westeurope |
| AppInsightsLocation | Location for the deployment of the Azure Application Insights. E.g. westeurope or westus. Default is westeurope |
| TenantName | Your tenant name. E.g. YourCompany or Contoso |
| CompanyPrefix | Company or Department prefix in 2 or 4 characters. E.g. POR, BDO, HEI or CON. |
| KeyExpirationYears | (Optional) Indicates when keys will expire. Choice 1 year, 2 years or Never. Default is 1 year. |
| WorkerWebJobs | (Optional) Number of Make Worker web jobs to be deployed with a maximum of 5. Default is 1. |
| UpdaterWebJobs | (Optional) Number of Make Updater web jobs to be deployed with a maximum of 5. Default is 1. |
| ConfigFile | (Optional) Path to config file with custom naming convention for Make resources |
| ExistingSPOSiteUrl | (Optional) URL to existing SharePoint Online site for Make |
| MFA | (Switch) Indication that MFA is enabled for the user account that does the installation |
| SplitTenants | (Switch) Indicates that Azure and Office 365 are different tenants with their own Azure AD |
For a more detailed description, execute the following PowerShell command:
Get-Help .\Install-Make.ps1 -detailed
Examples:
.\Install-Make.ps1 -Environment PRD -Location westeurope -AppInsightsLocation westeurope -TenantName rapidcircle -CompanyPrefix RC -KeyExpirationYears 2 -WorkerWebJobs 3 -UpdaterWebJobs 2 -ExistingSPOSiteUrl https://rapidcircle.sharepoint.com/sites/make-admin
.\Install-Make.ps1 -Environment ACC -Location westeurope -AppInsightsLocation westeurope -TenantName rapidcircle -CompanyPrefix RC -KeyExpirationYears 2 -MFA
.\Install-Make.ps1 -Environment TST -TenantName rapidcircle -CompanyPrefix RC -ConfigFile “D:\InstallMake\MakeResources.config”
-
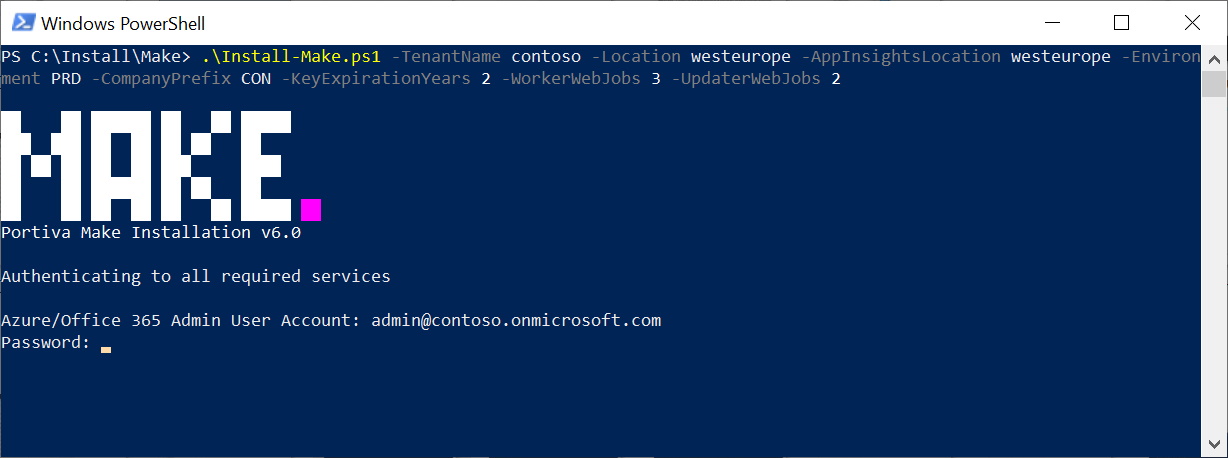
Execute the script Install-Make.ps1 and provide the correct values for each parameter.
-
Enter your credentials (Make sure you are an Azure and SharePoint Administrator)
Figure 2: PowerShell Enter Credentials
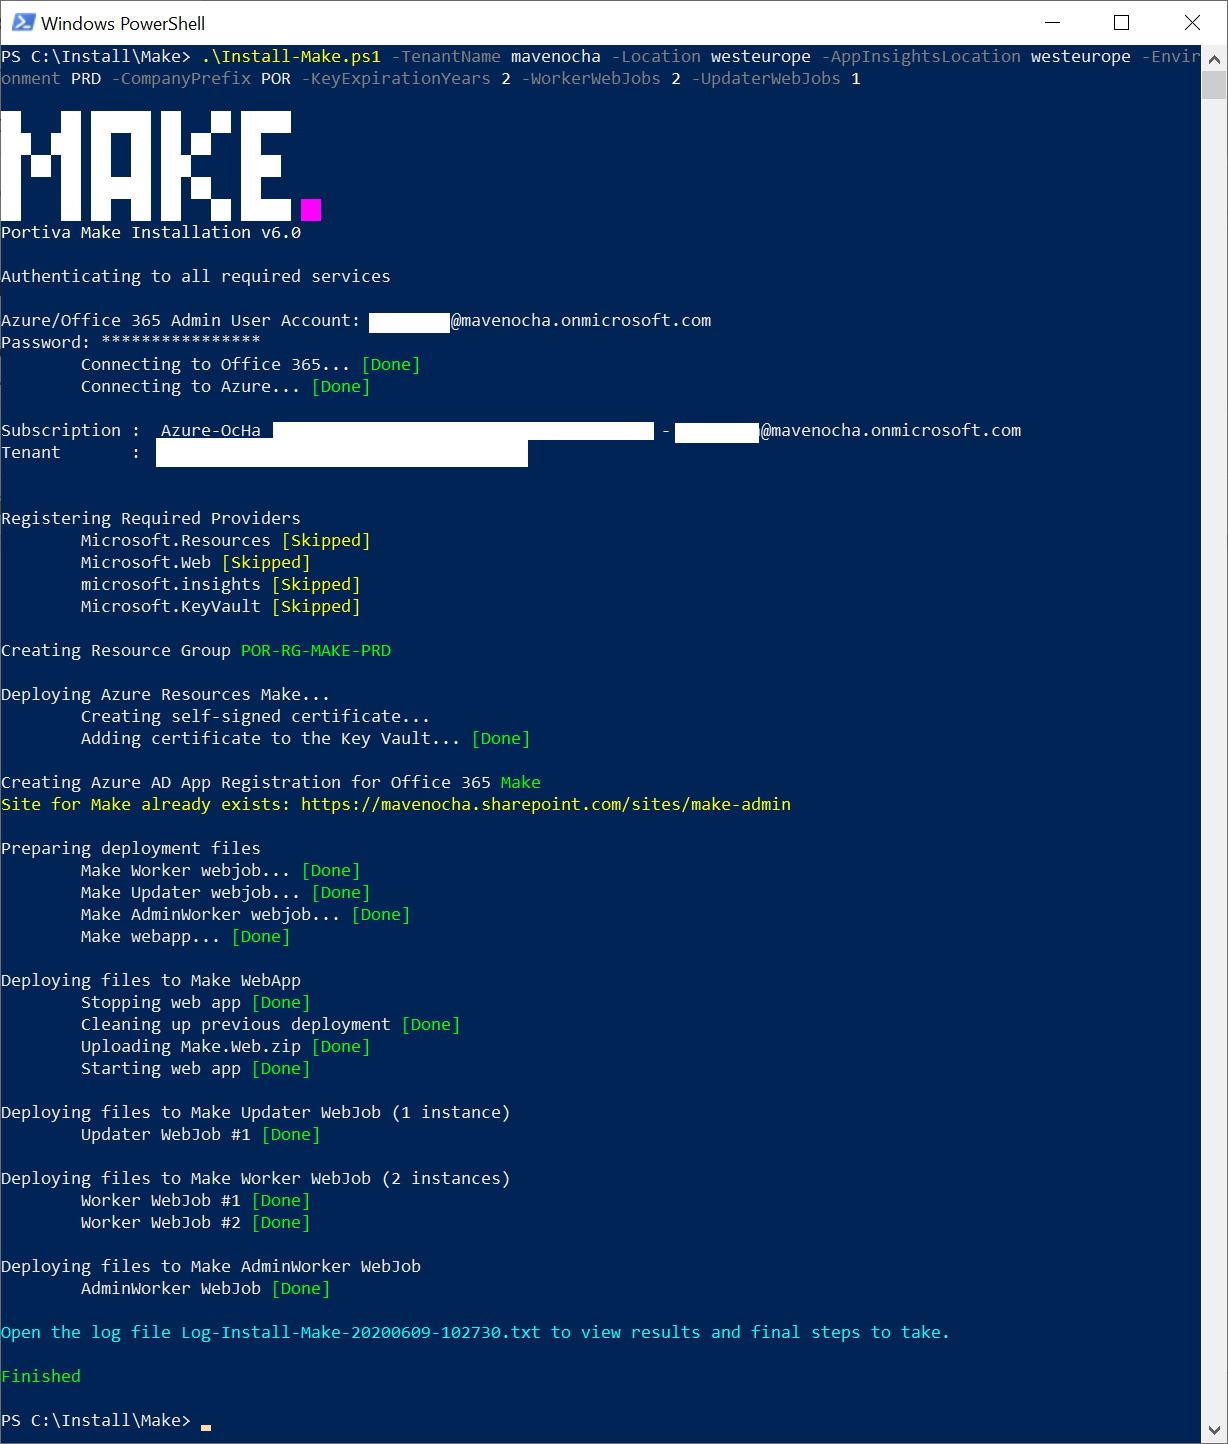
The installation creates and provisions all necessary resources.
NOTE |
If MFA is enabled for your administrator account, use the switch –MFA For each required service (such as Azure AD or SharePoint Online) a login window will appear to enter your credentials. |
NOTE |
If the switch –SplitTenants is used, then for each required service (such as Azure AD or SharePoint Online) a login window will appear to enter your credentials. Be sure, to enter the correct credentials for the specific tenant environment. The first login window is for Azure tenant and the following logins are for the Office 365 tenant. |
Figure 2: PowerShell log file
NOTE |
During the installation a log file is created that contains relevant information for your administration. |
Custom Config File
By default, the installation script uses the Rapid Circle naming convention for Azure resources, which is enough in most cases. However, if the customer has already its own naming convention, then a custom config file can be used. This config file is in XML format and looks like this:
|
|
A sample configuration file (Install-Make.config) is present in the installation folder. To use a custom configuration file, call the PowerShell installation script as follows:
.\Install-Make.ps1 -Environment TST -TenantName rapidcircle -CompanyPrefix RC -ConfigFile “D:\InstallMake\MakeResources.config”
All other parameters are optional. If not provided, the default values are used.
Grant Permissions – SharePoint App
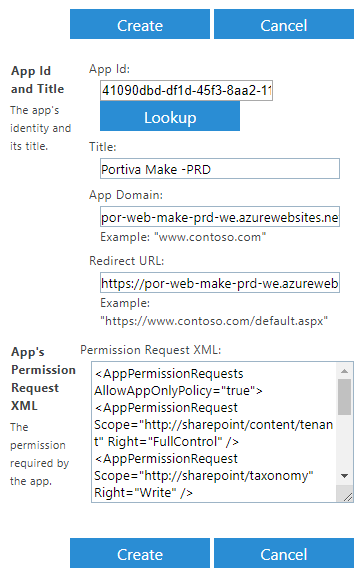
We need to allow Make as an App to create site collections in your tenant. For the correct values to use, open the installation log file.
- Navigate to the SharePoint Admin center or your tenant, located at https://<tenant>-admin.sharepoint.com and log in with your SharePoint Administrator account.
- In the address bar add “_layouts/15/appinv.aspx” to the URL. It will then look like this:
https://<tenant>-admin.sharepoint.com/_layouts/15/appinv.aspx - In the field App Id, enter the SharePoint App Client Id (see log file).
- Click on the button
Lookupand verify that the app Make is found (figure 3). - Enter the following permissions in the field Permission Request XML:
|
|
- Click on the button
Create
Figure 3: SharePoint App
- When the page is showing to trust the app Make, click on the button
Trust It
Grant Permissions – Azure AD App
Before Make can be used by any user, permissions need to be granted.
- Open the Azure Management Portal at https://portal.azure.com and log in with your Administrator account
- Navigate to Azure Active Directory, App Registrations
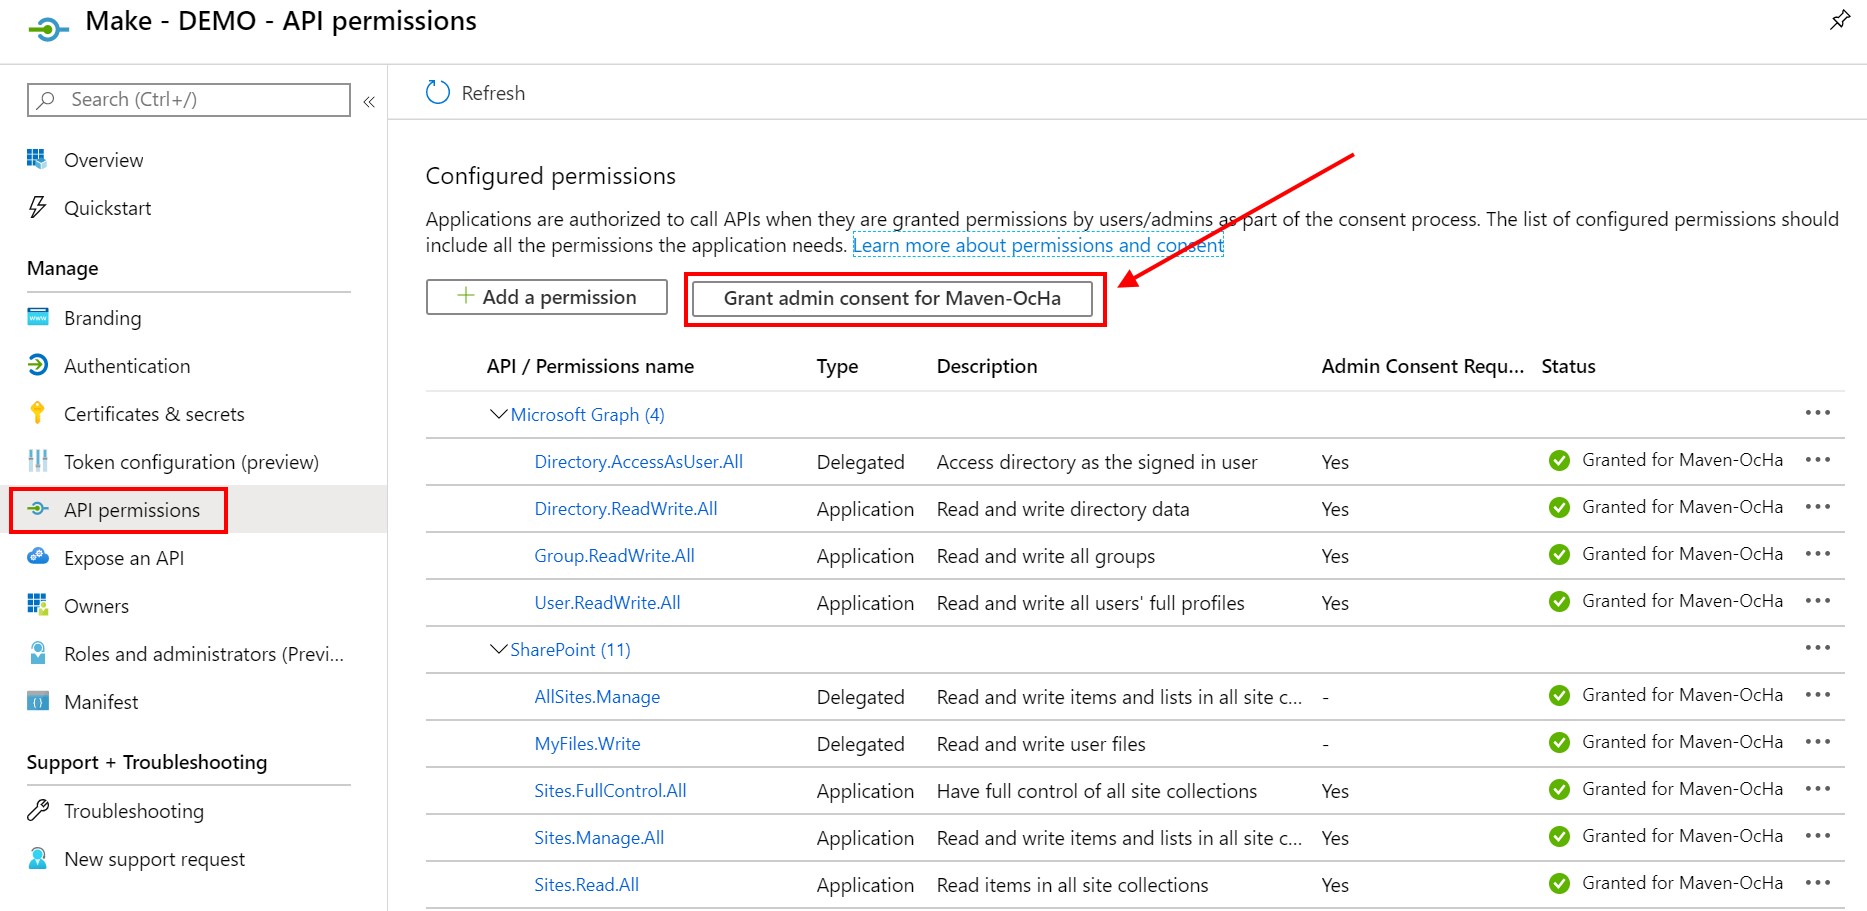
- Select the created App (E.g. Make) and from the blade, select API permissions.
- Click on the button
Grant admin consent
Figure 4: Grant Permissions
- At the top a popup is shown. Click on the button
Yes
Figure 5: Grant Permissions Yes
Make is now ready to be used.
Assign users
Not everyone can use Make. Users must be assigned before Make can be used.
- Open the Azure Management Portal at https://portal.azure.com and log in with your Administrator account
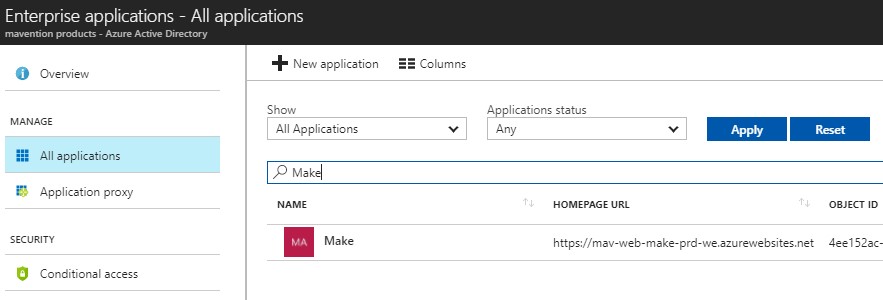
- Navigate to Azure Active Directory, Enterprise Applications and select All Applications
- Find and select the created App (E.g. Make).
Figure 13: All application
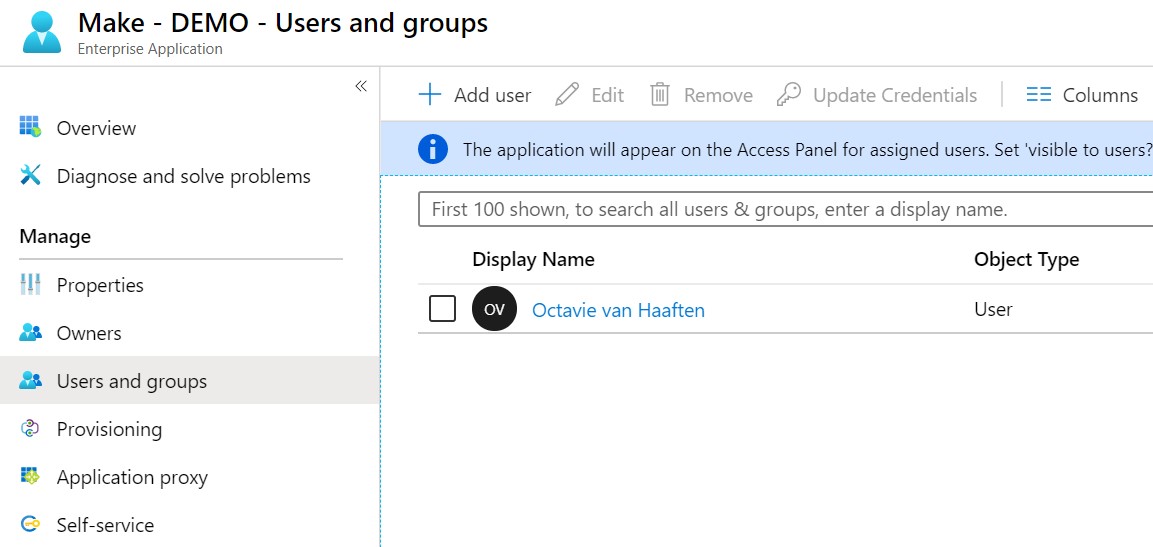
- From the App blade, select Users and Groups
- Add the users you want to provide access to Make.
Figure 14: Assign users
Renew key credentials
When installing Make you have chosen how many years (1, 2 or never) the key credentials are valid. If you have chosen that the key credentials will expire in 1 or 2 years, then you must renew the key before it expires otherwise Make stops working. This chapter explains how the key credentials can be renewed.
There are 2 components that use key credentials: the Make App Registration in Azure AD and the Make certificate file in the Azure KeyVault. To renew these, a PowerShell script is available that creates new key credentials and updates all Make configuration files.
- Start Windows PowerShell
- Navigate to the location of the Make installation script files (figure 1)
The script Renew-MakeKeyCredentials.ps1 needs to be executed. This script has the following parameters:
| Property | Description |
|---|---|
| AppRegistration | Name of the Make App Registration in Azure AD. E.g. “Make – DEV” |
| ResourceGroup | Name of the Azure Resource Group used for Make |
| WebApp | Name of the Azure Web App used for Make |
| KeyVault | Name of the Azure KeyVault used for Make |
| KeyExpirationYears | (Optional) Indicates when keys will expire. Choice 1 year, 2 years or Never. Default is 1 year. |
| RemoveExpiredKeys | (Switch) Indication to remove all expired keys |
| MFA | (Switch) Indication that MFA is enabled for the user account that does the installation |
For a more detailed description, execute the following PowerShell command:
Get-Help .\Renew-MakeKeyCredentials.ps1 -detailed
Example:
.\Renew-MakeKeyCredentials.ps1 -AppRegistration “Make - DEMO” -ResourceGroup “CON-RG-MAKE-DEMO” -WebApp “CON-WEB-MAKE-DEMO-WE” -KeyVault “CON-KV-MAKE-DEMO-WE” -KeyExpirationYears 1 -RemoveExpiredKeys
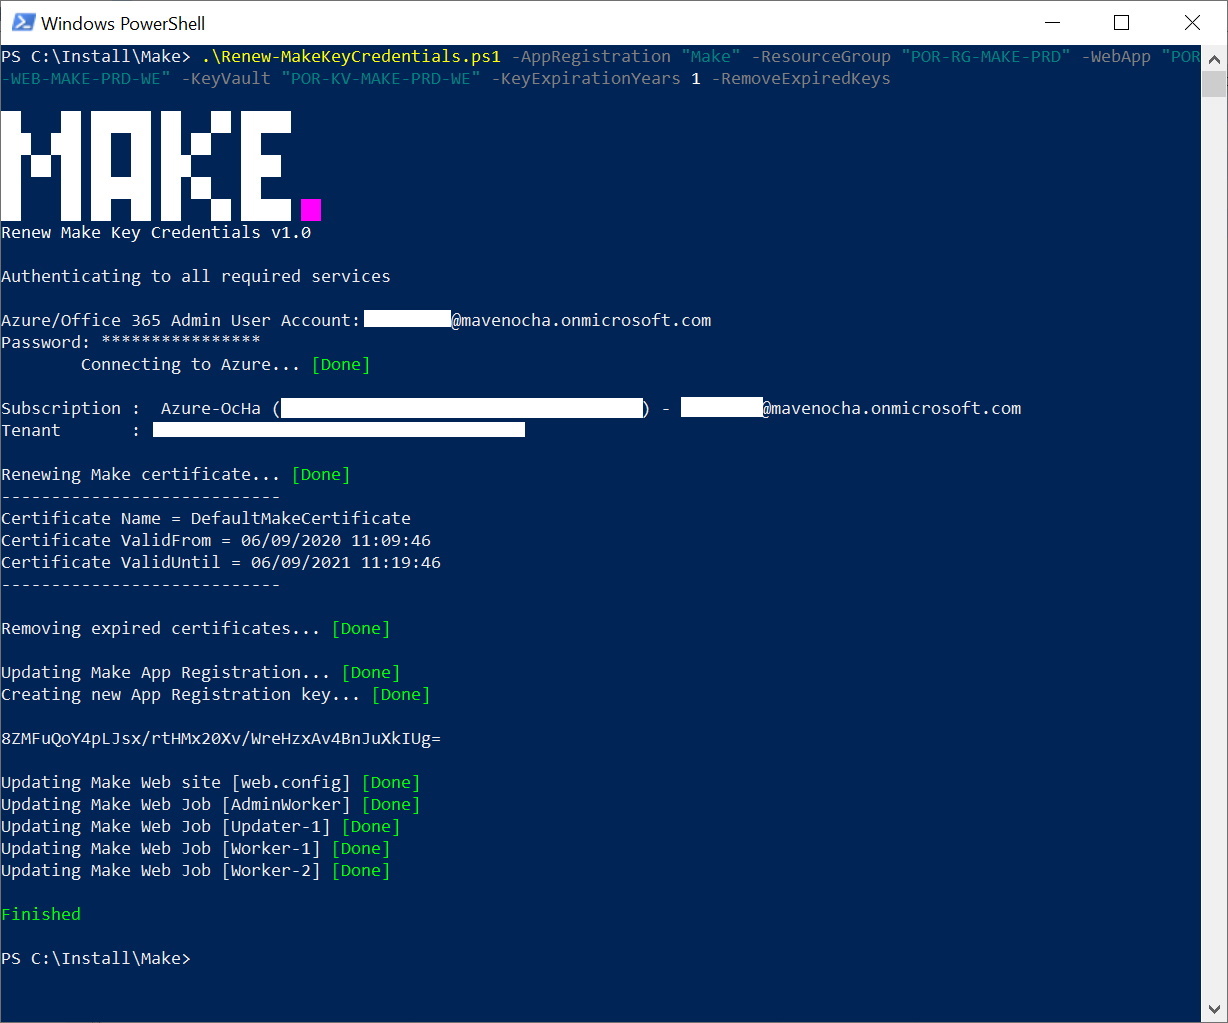
- Execute the script Renew-MakeKeyCredentials.ps1 and provide the correct values for each parameter (figure 15).
- Enter your credentials (Make sure you are an Azure Administrator)
Figure 15: Renew make credentials
After the script is run, you’ll be notified that all configuration files are updated (figure 16).
Figure 16: Renew make credentials finished
