The web app is used to deploy the Make website.
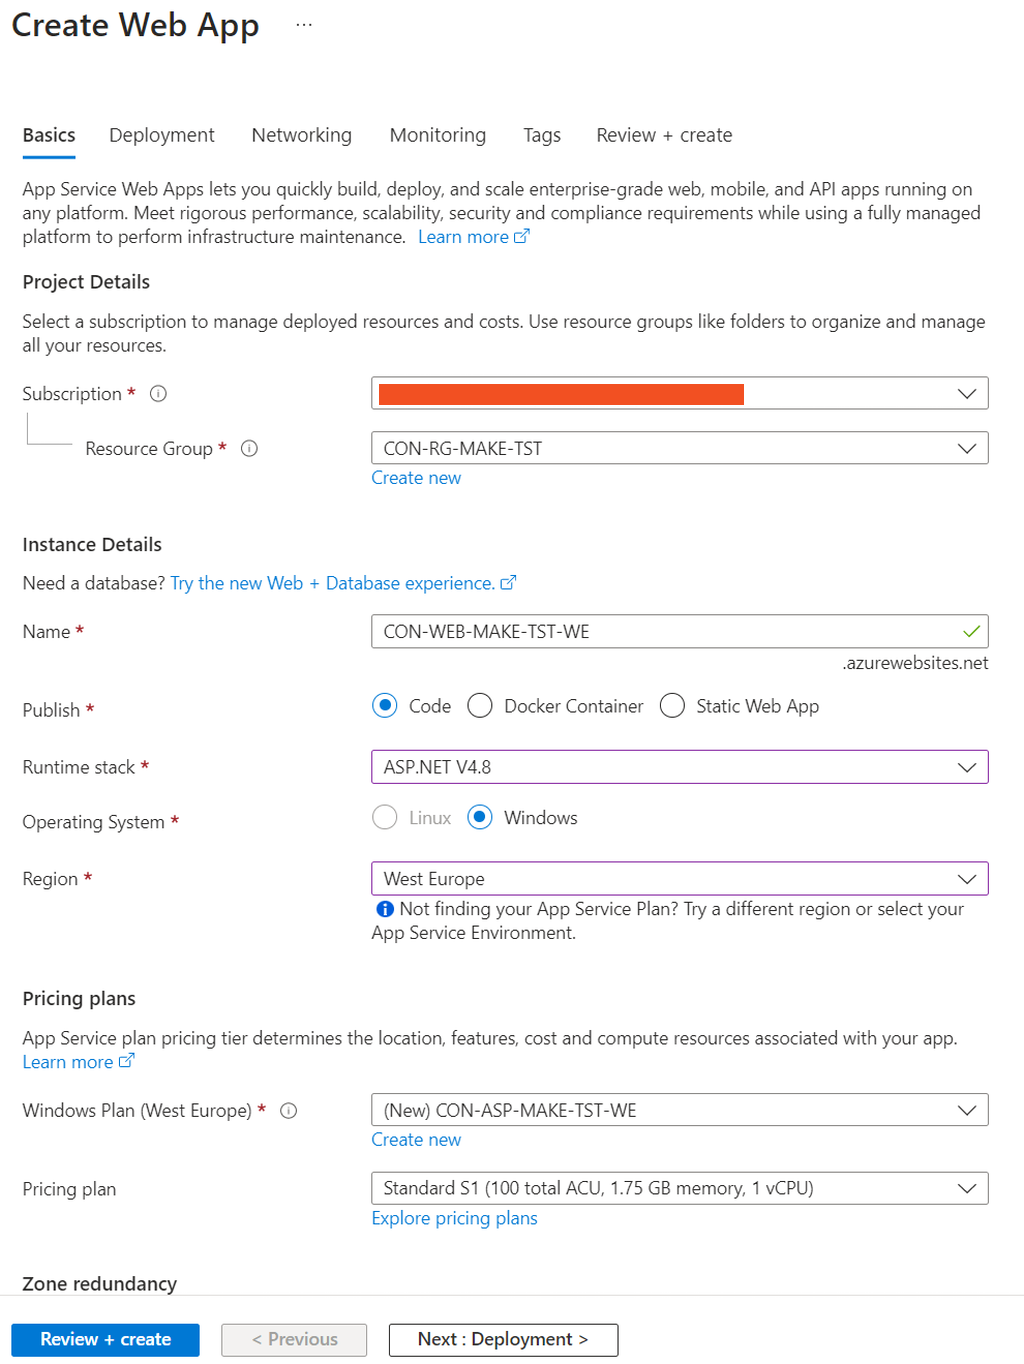
Go to your newly created resource group. Make sure you are on the overview page of your resource group. Click on ‘Create’ and search for ‘Web app’. Click on ‘Web app’ and on the right screen click on ‘Create’.
Leave the subscription and resource group values as they are. Fill in a name for your web app in the field ‘Name’. This name should be globally unique. A good practice is to use your company name together with the name ‘make’, e.g. ‘make-companyname’. As Runtime stack select ‘ASP.NET V4.8’. As OS select ‘Windows’.
At the option ‘App Service plan select ‘Create New’. Fill in a name for your service plan, e.g. ‘make-companyname’. Choose your Pricing tier. ‘S1 Standard’ is recommended by the Make Product Team. Click on ‘Ok’ to select your App Service plan/Location.
At the option ‘Application Insights’ choose for ‘On’. Click on ‘Create’ to create your web app.
Figure 1: Create Web App
Once created, go to the overview page of your Web App. Click on ‘Download publish profile’ to download the publish profile of the web app.
Figure 2: Create Web App
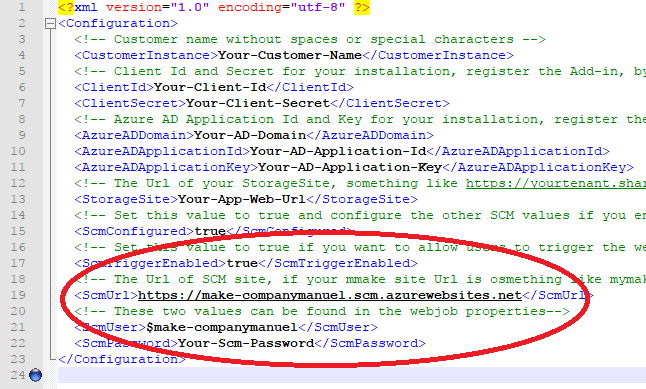
Open this file with a text editor. Search for the following values:
- userName (it should begin with a $)
- UserPWD (comes after the userName)
- publishUrl (you don’t need the port number, it should look like ‘make-companyname.scm.azurewebsites.net)
Add the values to the Set-MakeOnlineConfiguration.config. Fill in the userName between the tags ‘ScmUser’, the UserPWD between the tags ‘ScmPassword’ and ‘https://’ followed with ‘publishUrl’ between the tags ‘ScmUrl’. It should look like:
Figure 3: web.config


