Parameters

To create a template with some flexibility, you might want to use parameters. With parameters you can apply a template with variable values for whatever you want to create on your site. A common example is of course the title of the site. But think of list names, custom security groups or other metadata as well.

NOTE A configuration always requires 3 mandatory parameters: url, title and owner

Using Make Website

The easist way of managing parameters is by using the Make website.

  • Navigate to View Configurations
  • Select your configuration

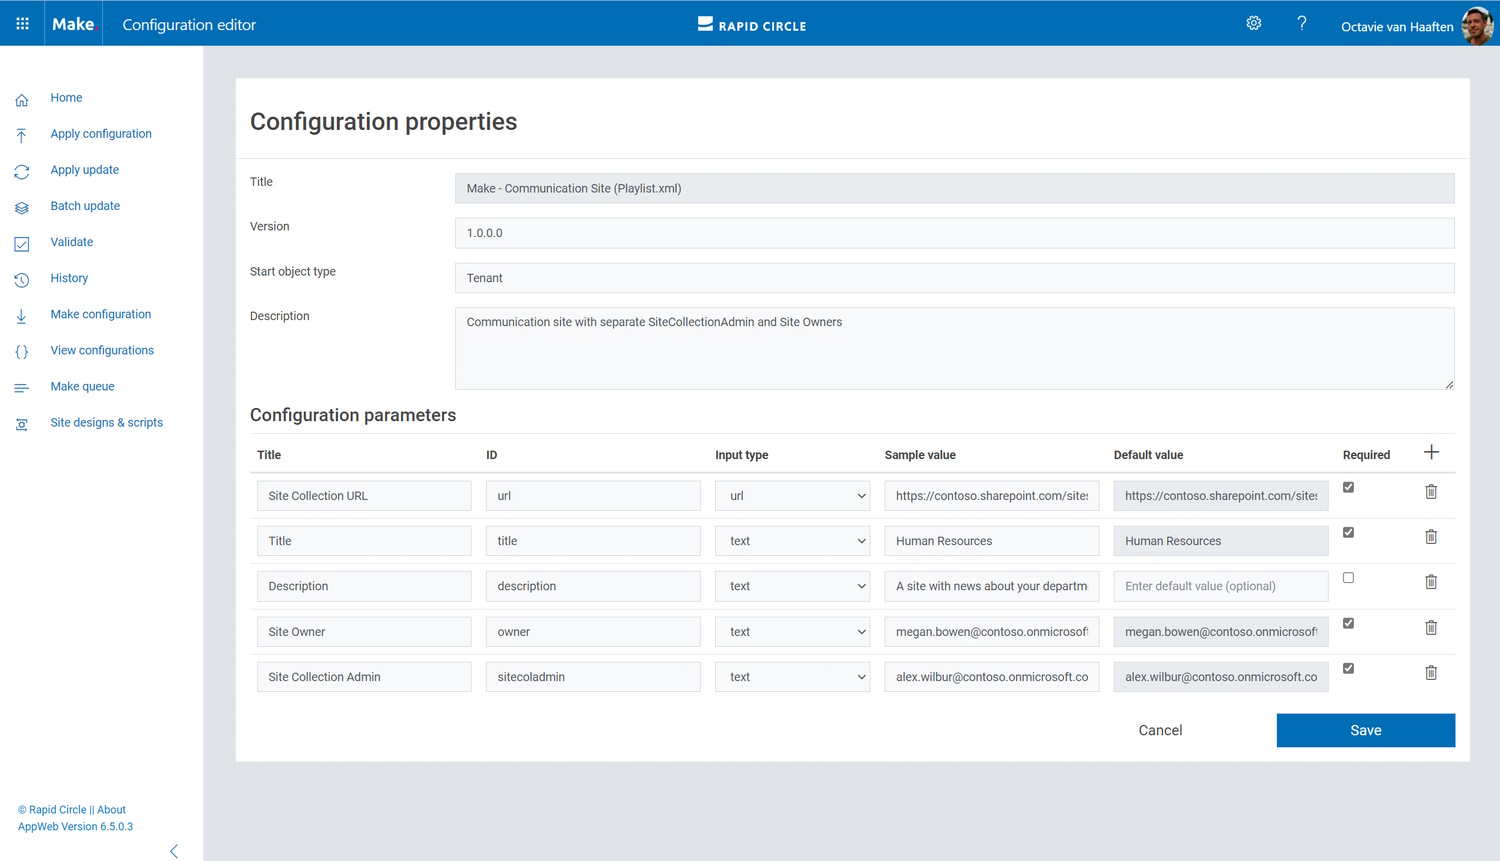
Figure 1: Parameters Configuration

Here you can add, edit and delete parameters.

The column ID is very important. This value is being used in your XML template. And remember, 3 parameters are mandatory: url, title and owner. These are the ID values.

The column Title is what you see as a user when applying a configuration and you fill in the values to be used when provisioning a site.

The column Input Type defines what value is to be expected. Choose one of the following types: url, text, alphanumeric, multiline and taxonomy.

The column Sample Value creates a placeholder to give some indication what the user should be filling in as a value for provisioning.

The column Default Value will define the value already filled in when applying a configuration. This is quite handy for those parameters that always have the same value. E.g. Site Collection Admin or Project Manager.

JSON

All parameters are stored in JSON format in the metadata column Parameters of the configuration file in the SharePoint library. But how does this look like?

 1
 2
 3
 4
 5
 6
 7
 8
 9
10
11
12
13
14
15
16
17
18
19
20
21
22
23
24
25
26
27
28
29
30
31
32
33
34
35
36
37
38
39
40
41
42
43
44
45
46
47
{
  "d": {
    "parameters": [
      {
        "id": "url",
        "title": "Site Collection URL",
        "inputType": "url",
        "required": true,
        "sampleValue": "https://contoso.sharepoint.com/sites/communicationsite",
        "value": "https://contoso.sharepoint.com/sites/communicationsite"
      },
      {
        "id": "title",
        "title": "Title",
        "inputType": "text",
        "required": true,
        "sampleValue": "Human Resources",
        "value": "Human Resources"
      },
      {
        "id": "description",
        "title": "Description",
        "inputType": "text",
        "required": false,
        "sampleValue": "A site with news about your department",
        "value": ""
      },
      {
        "id": "owner",
        "title": "Site Owner",
        "inputType": "text",
        "required": true,
        "sampleValue": "megan.bowen@contoso.onmicrosoft.com",
        "value": "megan.bowen@contoso.onmicrosoft.com"
      },
      {
        "id": "sitecoladmin",
        "title": "Site Collection Admin",
        "inputType": "text",
        "required": true,
        "sampleValue": "alex.wilbur@contoso.onmicrosoft.com",
        "value": "alex.wilbur@contoso.onmicrosoft.com"
      }

    ]
  }
}

If you familiar and feeling confident with JSON, you can edit this directly using your favorite editor.

Using Parameters in your template

To use your parameters in the XML template, you need to place the ID value between accolades: {title}, {sitecoladmin}, {url}, etc…

1
2
3
4
5
6
7
<Site Url="{url}" Title="{title}" Template="STS#3" LCID="1033" OwnerLogin="{owner}" UserCodeQuota="0" StorageQuota="0">
    <RootWeb Url="{url}" Title="{title}" Description="{description}" Template="STS#3" LCID="1033">
        <Features>
            <Feature Id="8a4b8de2-6fd8-41e9-923c-c7c3c00f8295" Name="Open Documents in Client Applications by Default"/>
        </Features>
    </RootWeb>
</Site>